A Dress Form makes clothing construction faster and easier. If you are making your own clothing from scratch, a dress form is a must have to ensure a proper fit. Buying a pattern from the store has a generic measuring guide, but they almost always need some kind of tweaking. Unfortunately, this valuable tool is also an expensive tool. If you make all of your own clothing and your weight stays at a constant, then it may be worth the investment. However, if you work on clothing for others, or your size changes, the ability to create a custom dress form for about $10 is pretty awesome. All you need is a few rolls of good quality duct tape, an old t shirt, and some polyfil stuffing.
I found this brilliant idea about a year ago while surfing the web. I originally saw it on threadbangers.com, but their website seems to be going through a few changes. So here it is, straight to you, with a few adjustments. If the dress form is for you, you will need a friend or family member to wrap you. Preferably one you don’t mind groping you.
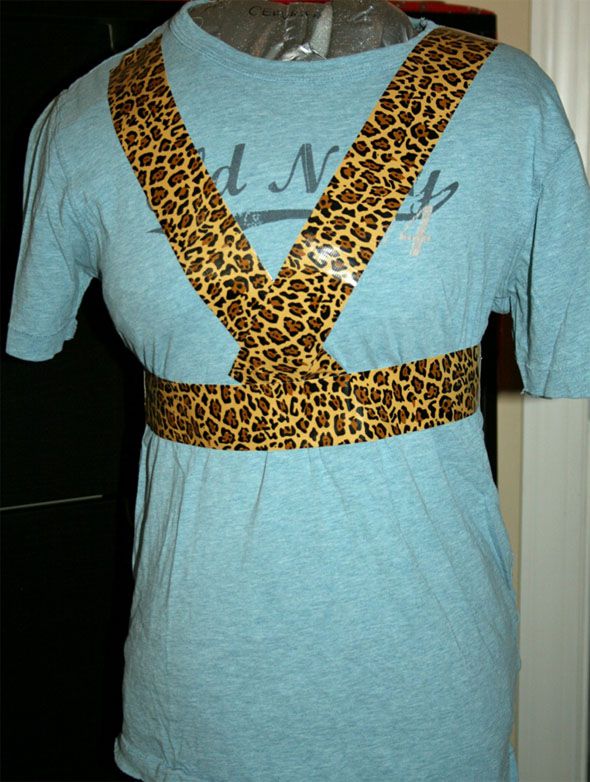
For instructional purposes, I am going to duct tape an already made dress form. I love the printed duct tape, however I recommend making the foundation of your body form from the original high quality silver duct tape. When you are finished, you can go back and cover it with a single layer of the cool printed duct tape.
Put on an old t-shirt that reaches your hip bones. Wrap a strip of duct tape around your natural waist line. To find your natural waist line, simply bend to the side. Where your abdomen skin folds is your natural waist. One strip at a time, attentively mold the bust area. The bust area shapes best when the duct tape is placed diagonally.

Continue placing stripes on the bust smoothly. Aim for 3 layers of duct tape.

Once the bust is finished, move on to the shoulders and back. Long strips starting from the shoulders and extending down the back shape best.
Finish up by encasing the abdomen and back in duct tape. Aim for as many continuous strips as possible, as if you were wrapping the abdomen in a bandage. Make sure whoever is being wrapped isn’t moving about or bending and is standing up straight. I have found that 3 layers of duct tape works best. Too many layers will add bulk to the dress form and measurements will be off.
To remove the dress form, cut straight up the back of the shirt with a pair of scissors. Careful not to cut whoever you’re wrapping, blood is a pain to get out of carpet. =D
Now that the dress form is off, tape up the back you just cut. Also tape up the bottom of the shirt (leave an opening large enough for a stand) and arm holes. Leave a hole in the neck large enough to fit your hand through. Stuff the dress form with polyfil stuffing. I have seen people use newspaper as stuffing, but I have found that the polyfilament holds pins better. If this dress form is for a woman, I recommend stuffing the bust area with rolled up socks. Make sure this area is nice and stuffed as to maintain the shape. No concave breasts.
The fastest way to make a stand is to use the stand from a fake Christmas tree. It is the perfect height. You could also use a real Christmas tree stand with a large wooden pole. Or you can use a floor lamp stand, minus the shade, light bulb, and electrical cord. Even a sturdy tripod can be a dress form stand. Was that easy or what?


